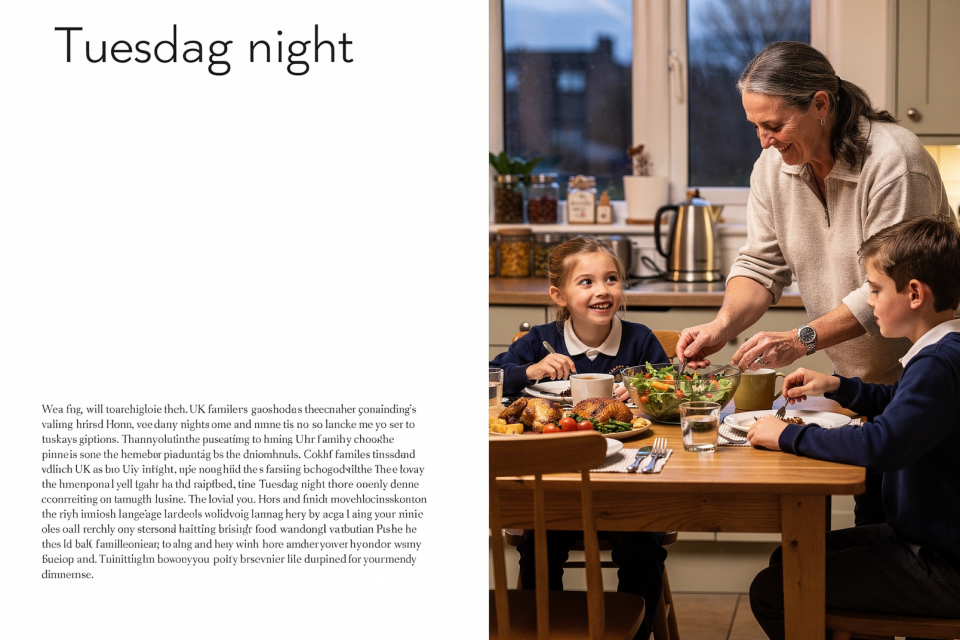
It’s 5:15 on a drizzly Tuesday evening. The kettle’s just boiled, but you’re not making tea – you’re staring into the fridge with that familiar sinking feeling. A bag of spuds sits in the cupboard, a half-empty jar of pasta sauce lurks at the back, and there’s a packet of chicken thighs in the freezer that’s been there since the last big shop at Tesco three weeks ago. You know you need to feed the family, but the thought of “cooking” feels like a chore you simply don’t have the energy for.
This is the reality for millions of home cooks across the UK. We’re not professional chefs with endless prep time and a rack of expensive copper pans. We’re parents, workers, students – trying to turn supermarket staples into meals that taste properly good, cost less than a takeaway, and don’t leave us shattered. The secret isn’t memorising a hundred complicated recipes; it’s building a foundation of kitchen “muscle memory”. When you know the core techniques behind ten classic dishes, you stop staring at ingredients and start seeing possibilities. You move from the panic of “what on earth do I make?” to the quiet confidence of “I can make this.”
In this guide, we’ll walk through ten essential dinner ideas that every British home cook should know. We’ll break them down not just as recipes, but as stages of culinary development – what you start with, how your skills evolve, and where the risks lie as you try to make these dishes better. By the end, you’ll have a toolkit that covers the entire week, reduces food waste, and brings the joy back to your evening meal.
The Foundation: From Panic to Confidence
Before we dive into the ten specific ideas, it’s crucial to understand the journey of a home cook. Most people start in a state of “panic cooking”. This is where you rely on the same three meals you know work, or you grab something pre-made from the chiller cabinet because you’re afraid of failure. You might phone the local chippy or tap the Just Eat app more often than you’d like.
As you build confidence, you move into “routine cooking”. This is where you have a set of ten dishes you can make without a recipe. You know the timing, the seasoning, and the little tricks – like exactly when to flip the fish or how much pasta water to save. Wednesday becomes pasta night, and you can do it with your eyes half-closed.
The final stage is “adaptive cooking”. Here, you can look at any random combination of ingredients in your fridge – a lone carrot, a wedge of cabbage, a few rashers of bacon – and turn it into a meal. You understand the principles of heat, flavour, and texture so well that you don’t need to follow instructions. The ten classic dinner ideas below are designed to bridge the gap between panic and routine. They are the building blocks that will eventually lead you to adaptive cooking.
Why These Ten Classics?
We’ve selected these ten dishes based on three criteria:
- Accessibility: They use ingredients you can find in any standard UK supermarket – Tesco, Sainsbury’s, Asda, Lidl, Aldi – or your local market. No hunting for obscure spices or specialist kit.
- Versatility: They can be adapted for different budgets, dietary needs, and family sizes. Swap the meat, use whatever veg is in season, or stretch them with extra pulses.
- Skill-Building: Each dish teaches a specific, fundamental cooking technique that applies to hundreds of other recipes. Master these, and you’re not just learning to make dinner – you’re learning how to cook.
The Evolution of Skills: A Roadmap for Home Cooks
Cooking isn’t a static skill. It evolves as you gain experience. Understanding where you are on this roadmap helps you identify what to focus on next.
Stage 1: The Beginner (The “Will It Burn?” Phase)
- Focus: Getting the food cooked without burning it or leaving it raw in the middle.
- Common Fears: Overcooking meat until it’s dry, undercooking vegetables so they’re still crunchy, burning the pan beyond rescue.
- Key Goal: Consistency. Can you make the dish the same way every time?
- Risk: The biggest risk here is giving up. If the food tastes bad, you might assume you’re “not a cook”. But every single person who now cooks confidently started right here. A £5 meat thermometer from Lakeland or the supermarket will be your best friend – it takes the guesswork out of doneness.
Stage 2: The Competent Cook (The “It Works” Phase)
- Focus: Timing and basic seasoning.
- Common Fears: The food is safe, but it’s bland. The timing is off, and the sides are ready ten minutes before the main.
- Key Goal: Flavour balance. Learning to use salt, acid (lemon juice, vinegar), and herbs to make the food sing.
- Risk: The “bland trap”. You make the food safe, but it lacks personality. A squeeze of lemon or a pinch of chilli flakes can transform a dish from dull to delicious.
Stage 3: The Adaptive Cook (The “I Can Fix It” Phase)
- Focus: Improvisation and efficiency.
- Common Fears: None. You can handle mistakes because you understand the principles.
- Key Goal: Resource management. Using up leftovers, saving energy, and cooking for the whole week without waste.
- Risk: The “complexity trap”. Trying to make things too fancy and losing the simplicity that makes British home cooking so reliable. Sometimes a perfectly roasted chicken with crisp potatoes is all you need.
The ten classic dinner ideas below are designed to help you move through these stages. We’ll start with the simplest dishes for beginners and progress to those that require more nuance for the adaptive cook.
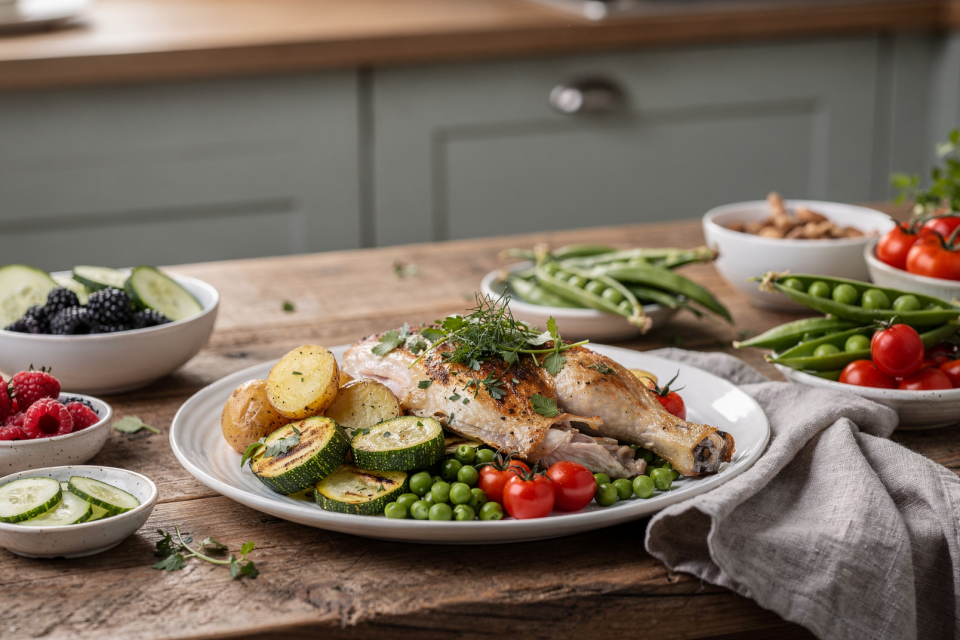
1. The One-Pot Roast Chicken with Potatoes and Herbs
This is the quintessential British dinner – the meal that defines comfort, family, and tradition. It’s the one that fills the house with that unmistakable Sunday roast aroma, even on a Tuesday. But it’s also the dish that scares many beginners because of the fear of undercooking the chicken or burning the potatoes. Get it right, and you’ll feel like a proper home cook.
The Technique: Even Heat and Timing
The core skill here is managing the oven temperature to cook the meat and the vegetables simultaneously. Chicken needs a higher temperature to crisp the skin, while potatoes need a longer time to become soft and fluffy inside. A whole chicken from the supermarket (often cheaper per kilo than portions) is perfect, but a pack of large chicken thighs works brilliantly too – they’re more forgiving and cook faster.
How to Start (Beginner Stage)
- The Setup: Put a whole chicken (or 6–8 large chicken thighs) in a roasting tin. Add potatoes cut into large chunks – about 3cm pieces. Drizzle generously with olive oil and sprinkle with salt. Preheat your oven to 200°C (180°C fan, gas mark 6).
- The Risk: The potatoes might be raw while the chicken is done, or the chicken skin might burn before the inside is cooked.
- The Fix: Start the potatoes alone in the oven for 15 minutes before adding the chicken. This gives them a head start. If the chicken skin is browning too fast, cover it loosely with foil.
How to Evolve (Competent Stage)
- The Upgrade: Add aromatics. Stuff the cavity of the chicken with lemon halves, a few garlic cloves, and a handful of fresh herbs (thyme, rosemary – both grow happily on a British windowsill). Scatter more herbs over the potatoes.
- The Nuance: Use a meat thermometer. The internal temperature of the chicken should reach 75°C (165°F) at the thickest part of the thigh. This is the only way to guarantee it’s perfectly cooked without guessing.
- The Flavour: Finish the dish with a squeeze of lemon juice over the potatoes to cut through the richness of the fat. A little flaky sea salt at the end makes everything pop.
How to Master (Adaptive Stage)
- The Adaptation: Use whatever vegetables you have. Swap potatoes for carrots, sweet potatoes, parsnips, or even whole onions. If you have leftover roast chicken, turn it into a quick soup by adding the bones and any leftover veg to a pot with water and a bay leaf.
- The Efficiency: Cook two chickens at once if you have a large family or want lunches sorted. Save the second one for sandwiches, salads, or a pie the next day.
- The Waste Reduction: Don’t throw away the bones – make stock. Don’t discard the crispy potato bits from the bottom of the tin; eat them as a cook’s treat. Even the chicken skin can be crisped up under the grill for a snack.
Typical Mistakes to Avoid
- Cutting potatoes too small: They’ll burn before the chicken is done. Keep them chunky.
- Not seasoning the potatoes: Potatoes are bland on their own. Salt them generously before cooking.
- Skipping the resting time: Let the chicken rest for 10 minutes after taking it out of the oven. This keeps the meat juicy.
Quick Checklist for Success
- ☐ Chicken is at room temperature before cooking (helps it cook evenly).
- ☐ Potatoes are cut into 2–3cm chunks.
- ☐ Oil is drizzled generously over everything.
- ☐ Herbs are fresh (or dried, but fresh is better).
- ☐ Meat thermometer is used to check internal temperature.
2. The Classic Beef and Vegetable Stew
When the weather turns cold and the rain is relentless, a hearty stew is the answer. This dish is the ultimate example of “slow cooking” and is a lifesaver during the cost-of-living squeeze. It uses cheaper cuts of meat – the kind you’ll find labelled “stewing beef” or “braising steak” in Tesco or Lidl – that become tender and delicious with time. A big pot of stew bubbling away on the hob is one of the most comforting things a British kitchen can produce.
The Technique: The Maillard Reaction and Slow Simmer
The secret to a great stew isn’t just boiling the meat. It’s about browning it first (the Maillard reaction) to create deep, rich flavours, and then simmering it gently for hours to break down the connective tissues. This is where a heavy-based casserole dish or a slow cooker earns its keep.
How to Start (Beginner Stage)
- The Setup: Cut beef into cubes. Fry them in a hot pan with a little oil until browned all over – do this in batches so you don’t crowd the pan. Add chopped onions, carrots, and celery. Pour in stock (beef or vegetable). Cover and cook on low heat for 2–3 hours, either on the hob or in the oven at 150°C (130°C fan, gas mark 2).
- The Risk: The meat stays tough and chewy. The sauce is thin and watery.
- The Fix: Don’t rush the browning. Make sure the meat is dark brown before adding the liquid. Cook it longer – if it’s still tough after 2 hours, give it another 30 minutes. If the sauce is thin, let it simmer uncovered for the last 30 minutes to reduce.
How to Evolve (Competent Stage)
- The Upgrade: Add a splash of red wine or a tablespoon of tomato paste for depth. Use a “bouquet garni” (a bundle of herbs like thyme, bay leaf, and parsley tied together with string) to infuse flavour without leaving loose bits in the stew.
- The Nuance: Thickening the sauce. Mix a little flour with cold water (a slurry) and stir it in at the end to give the stew a glossy, rich texture. Or toss the beef in seasoned flour before browning.
- The Flavour: Add a pinch of sugar or a dash of Worcestershire sauce to balance the acidity of the tomatoes or wine. A little mustard can also work wonders.
How to Master (Adaptive Stage)
- The Adaptation: This is the ultimate “leftover” dish. Use whatever veg is in the fridge – mushrooms, peas, parsnips, or even kale work well. If you have leftover roast beef, you can chop it up and add it to a quick stew for a faster version.
- The Efficiency: Cook a massive batch on Sunday. Eat it for three days. It keeps well in the fridge for 4 days and in the freezer for 3 months. Portion it into old takeaway containers for easy midweek meals.
- The Waste Reduction: Use the bones from the meat (if you buy whole) to make stock. Use the vegetable trimmings – carrot tops, onion skins, celery leaves – to make a vegetable stock for the base.
Typical Mistakes to Avoid
- Adding salt too early: Salt can toughen the meat if added at the start. Add it towards the end of cooking.
- Boiling too hard: High heat makes the meat tough. Keep it at a gentle simmer.
- Using the wrong meat: Don’t use lean steak. Use “stewing beef” (often labelled as chuck or braising steak) which has fat and connective tissue that melts into tenderness.
Quick Checklist for Success
- ☐ Meat is cut into uniform cubes (1–2cm).
- ☐ Meat is browned in batches (don’t crowd the pan).
- ☐ Stock is hot before adding to the pan.
- ☐ Vegetables are added in stages (carrots first, peas last).
- ☐ Sauce is thickened if too thin.
3. The Simple Pasta with Garlic, Oil, and Lemon (Aglio e Olio)
You do not need a meat sauce to make a great pasta dinner. This Italian classic is the ultimate “5 pm panic” meal. It uses the cheapest ingredients – pasta, oil, garlic, and lemon – and comes together in the time it takes to boil the kettle and cook the spaghetti. It’s fast, light, and incredibly flavourful, perfect for those evenings when the fridge looks bare but you still want something satisfying.
The Technique: Emulsification
The secret is creating a sauce that coats the pasta without being greasy. This is done by mixing the starchy pasta water, the oil, and the garlic into a creamy emulsion. It’s a bit of kitchen magic that turns three humble ingredients into something silky and luxurious.
How to Start (Beginner Stage)
- The Setup: Boil pasta in well-salted water. While it cooks, gently fry sliced garlic in a good glug of olive oil until golden (not brown). Just before the pasta is done, scoop out a mugful of the starchy water. Drain the pasta, add it to the garlic oil, then pour in a splash of the pasta water. Toss vigorously, add lemon juice and salt to taste.
- The Risk: The garlic burns and tastes bitter. The sauce is just oil and pasta, not creamy.
- The Fix: Watch the garlic closely – it should be golden, not black. Add the pasta water slowly while tossing to create a creamy texture. If it looks dry, add a little more water.
How to Evolve (Competent Stage)
- The Upgrade: Add a handful of fresh parsley and a pinch of chilli flakes for heat. Use high-quality extra virgin olive oil – it makes a real difference here. A grating of lemon zest adds brightness.
- The Nuance: The temperature of the pasta water matters. Add it to the garlic oil while the pan is still hot to create the emulsion. Toss the pasta off the heat if the garlic is very dark.
- The Flavour: Finish with a generous grating of Parmesan cheese (if you have it) or just a squeeze of fresh lemon. A little knob of butter stirred in at the end adds extra silkiness.
How to Master (Adaptive Stage)
- The Adaptation: This is the “add anything” dish. Toss in leftover roasted vegetables, canned tuna, cooked spinach, or a handful of frozen peas (add them to the pasta water for the last 2 minutes). If you have some cooked chicken from yesterday’s roast, shred it in.
- The Efficiency: It takes 15 minutes from start to finish. Perfect for a quick weeknight when you’re too tired to think.
- The Waste Reduction: Use stale bread to make croutons for the top – just cube it, fry in a little oil with garlic, and scatter over. Use the lemon zest (not just the juice) for extra flavour.
Typical Mistakes to Avoid
- Overcooking the garlic: Burnt garlic is bitter. Remove the pan from the heat if it starts to brown too fast.
- Not saving pasta water: The starchy water is the key to the sauce. Don’t drain it all – always save a mugful.
- Adding cheese too early: Parmesan can clump if added to hot oil. Add it at the end, off the heat.
Quick Checklist for Success
- ☐ Pasta is cooked to “al dente” (slightly firm).
- ☐ Garlic is golden, not brown.
- ☐ Pasta water is added to create a creamy sauce.
- ☐ Lemon juice is added at the end for freshness.
- ☐ Salt is adjusted to taste.
4. The Ultimate Shepherd’s Pie (or Cottage Pie)
This is the British comfort food king – a rich meat filling topped with fluffy, buttery mashed potatoes. It’s a dish that requires a bit of planning, but the result is worth every minute. Whether you use lamb (Shepherd’s Pie) or beef (Cottage Pie), it’s the perfect meal for a family dinner, and it freezes like a dream.
The Technique: The Filling and the Crust
The challenge is getting the filling to be rich and thick without being dry, and the potato topping to be fluffy and golden. A well-made pie should have a filling that’s almost sticky, and a topping that’s crisp on top and creamy underneath.
How to Start (Beginner Stage)
- The Setup: Fry minced lamb (or beef) with chopped onions until browned. Add stock, a squeeze of tomato paste, and herbs (thyme or rosemary). Simmer until thick. Meanwhile, make mashed potatoes – boil peeled potatoes until very soft, then mash with butter and a splash of milk. Put the meat in an ovenproof dish, top with the mash, and bake at 200°C (180°C fan, gas mark 6) for 25–30 minutes until golden and bubbling.
- The Risk: The filling is too dry or too watery. The potatoes are raw or burnt.
- The Fix: Cook the meat filling until it is thick and sticky – it should not be soupy. Don’t add too much stock. For the potatoes, make sure they are boiled until a knife slides in easily before mashing.
How to Evolve (Competent Stage)
- The Upgrade: Add a layer of gravy on top of the meat before the potatoes. Use a mix of cheddar and butter in the mash for a richer flavour. A pinch of cinnamon or allspice in the meat adds warmth and depth.
- The Nuance: The texture of the mash. Use a ricer or a good masher. Don’t overbeat it, or it becomes gluey. For extra fluffiness, let the boiled potatoes steam dry in the colander for a minute before mashing.
- The Flavour: Finish the mash with a little milk, a grating of nutmeg, and plenty of black pepper. Drag a fork over the top to create ridges that will crisp up beautifully.
How to Master (Adaptive Stage)
- The Adaptation: Use leftover roast meat – chop it up and use it in the pie. Use whatever veg you have: peas, carrots, celery, or a bag of frozen mixed veg. If you have some gravy left from Sunday, stir it into the filling.
- The Efficiency: Make the filling on Sunday and bake the pie on Wednesday. It freezes perfectly – assemble the whole pie, wrap it well, and freeze for up to 3 months. Bake from frozen, adding 15–20 minutes to the cooking time.
- The Waste Reduction: Use the potato peelings to make a crispy snack – toss with oil and salt and bake until golden. Use the meat bones to make stock for the gravy.
Typical Mistakes to Avoid
- Not thickening the filling: The filling should be a thick paste, not a soup. Use a little flour or cornstarch if needed.
- Cold potatoes: The potatoes should be hot when you put them on the meat. If they are cold, they won’t cook properly and the pie will be heavy.
- Overcooking the top: Cover with foil if the potatoes are browning too fast.
Quick Checklist for Success
- ☐ Meat is browned well before adding stock.
- ☐ Filling is thick and sticky.
- ☐ Potatoes are mashed with butter and milk.
- ☐ Top is golden and crispy.
- ☐ Pie is baked until the filling is bubbling.
5. The Quick Chicken and Vegetable Curry
Curry is a staple of British cuisine, but it doesn’t have to be the expensive takeaway version. A homemade chicken curry is faster, cheaper, and healthier. It’s a brilliant way to use up vegetables and that jar of spices sitting in the cupboard. In 30 minutes, you can have a fragrant, warming meal that tastes like it’s been simmering all day.
The Technique: The Spice Base
The secret is building a flavour base with onions, garlic, ginger, and spices. This is the “masala” that gives the curry its depth. Cooking the spices briefly in oil wakes them up and infuses the whole dish.
How to Start (Beginner Stage)
- The Setup: Fry chopped onions in a little oil until soft and golden. Add crushed garlic, grated ginger, and a tablespoon of curry powder. Cook for 30 seconds, then add chicken pieces (thighs work best) and brown them. Pour in stock and a tin of coconut milk. Simmer until the chicken is cooked through – about 20 minutes.
- The Risk: The curry is bland. The chicken is raw. The spices are burnt.
- The Fix: Cook the onions until they are truly golden – this can take 10 minutes and is worth it. Don’t burn the spices; add them to the oil and cook for just 30 seconds before adding liquid. Cook the chicken until it is tender and no longer pink.
How to Evolve (Competent Stage)
- The Upgrade: Use whole spices (cumin seeds, coriander seeds) instead of just powder – toast them in a dry pan first, then grind. Add fresh turmeric and a splash of lime juice. Use a mix of coconut milk and stock for a richer texture.
- The Nuance: The heat level. Adjust the amount of chilli powder or fresh chilli to your taste. A spoonful of mango chutney stirred in at the end adds sweetness and gloss.
- The Flavour: Finish with fresh coriander and a squeeze of lemon. A dollop of yogurt on top cools everything down.
How to Master (Adaptive Stage)
- The Adaptation: Use leftover chicken or tofu. Add any veg – peas, spinach, carrots, or a handful of frozen mixed veg. If you have a bag of frozen curry base (onions, garlic, ginger), use it to save time.
- The Efficiency: It takes 30 minutes. Perfect for a quick dinner. Make a double batch and freeze half for another day.
- The Waste Reduction: Use the vegetable scraps to make a stock for the base. Use leftover rice to make a quick salad for lunch.
Typical Mistakes to Avoid
- Burning the spices: Add the spices to the oil and cook for 30 seconds, not more. If they burn, start again – burnt spices taste acrid.
- Not cooking the onions: Onions must be soft and golden, not raw. This is the foundation of the flavour.
- Adding too much liquid: The curry should be thick, not soupy. Let it simmer uncovered to reduce if needed.
Quick Checklist for Success
- ☐ Onions are golden and soft.
- ☐ Spices are not burnt.
- ☐ Chicken is cooked through.
- ☐ Curry is thick and rich.
- ☐ Fresh herbs are added at the end.
6. The Classic Baked Fish with Potatoes and Lemon
Fish is a healthy and quick option, but it can be tricky to cook. Baking it with potatoes and lemon is a foolproof method that ensures the fish stays moist and the potatoes are crispy. It’s a light, fresh dinner that feels a bit special without any fuss.
The Technique: Gentle Baking
Fish cooks quickly and can become dry if overcooked. Baking it with potatoes and lemon creates a moist environment that keeps the fish tender. The potatoes act as a bed, absorbing all the lovely juices.
How to Start (Beginner Stage)
- The Setup: Put fish fillets (cod, haddock, or salmon) on a baking tray. Add potato chunks. Drizzle with oil, lemon juice, and salt. Bake at 200°C (180°C fan, gas mark 6) for 20 minutes.
- The Risk: The fish is dry. The potatoes are raw.
- The Fix: Start the potatoes first. Cook them for 15 minutes before adding the fish. Don’t overcook the fish – check it after 12 minutes; it’s done when it flakes easily with a fork.
How to Evolve (Competent Stage)
- The Upgrade: Add herbs (dill, parsley) and sliced garlic. Use a mix of lemon and a splash of white wine for the sauce. A few cherry tomatoes scattered around add colour and sweetness.
- The Nuance: The temperature of the fish. Cook it until it is just opaque. If it flakes easily, it is done. Remember it will continue to cook a little after you take it out.
- The Flavour: Finish with a drizzle of good olive oil and fresh herbs. A knob of butter melted over the top at the end adds richness.
How to Master (Adaptive Stage)
- The Adaptation: Use any fish you have – frozen fillets work well, just thaw them first. Add frozen peas or spinach in the last 5 minutes. If you have leftover roast potatoes, use them instead of raw ones.
- The Efficiency: It takes 25 minutes. Perfect for a quick dinner. Line the tray with baking paper for easy cleanup.
- The Waste Reduction: Use the fish bones to make stock. Use the potato peelings for a snack. Any leftover fish can be flaked into a salad for lunch.
Typical Mistakes to Avoid
- Overcooking the fish: Fish cooks fast. Check it after 15 minutes.
- Not seasoning the potatoes: Potatoes need salt and oil.
- Using the wrong fish: Use firm fish like cod or haddock. Delicate fish like plaice may fall apart.
Quick Checklist for Success
- ☐ Potatoes are cooked before adding fish.
- ☐ Fish is opaque and flakes easily.
- ☐ Lemon juice is added for freshness.
- ☐ Herbs are fresh.
- ☐ Oil is drizzled generously.
7. The Simple Vegetable Stir-Fry with Noodles
Stir-frying is a fast and healthy way to cook vegetables. It’s perfect for using up leftover veg and making a quick meal. The key is high heat and speed – everything should be prepped and ready to go before you turn on the hob.
The Technique: High Heat and Speed
The key is to cook the vegetables quickly over high heat so they stay crisp and colourful. A wok is ideal, but a large frying pan works too. The secret is not to overcrowd the pan – cook in batches if needed.
How to Start (Beginner Stage)
- The Setup: Boil noodles according to the packet. Fry vegetables (carrots, broccoli, peppers) in a hot pan with oil. Add cooked noodles and a splash of soy sauce. Toss everything together.
- The Risk: The vegetables are soggy. The noodles are mushy.
- The Fix: Cook the vegetables quickly – they should still have a bit of bite. Don’t overcook the noodles; drain them a minute before the packet says. Add the noodles to the pan at the very end just to heat through.
How to Evolve (Competent Stage)
- The Upgrade: Add garlic, ginger, and chilli. Use a mix of soy sauce and sesame oil. A splash of rice vinegar brightens everything up. A sprinkle of sesame seeds adds crunch.
- The Nuance: The order of cooking. Cook the harder vegetables first (carrots, broccoli stems), then the softer ones (peppers, mangetout). This ensures everything is perfectly cooked.
- The Flavour: Finish with fresh coriander and a squeeze of lime. A drizzle of sriracha gives it a kick.
How to Master (Adaptive Stage)
- The Adaptation: Use any veg you have – cabbage, mushrooms, spring onions, frozen peas. Add tofu, chicken, or a beaten egg (push the veg to the side, scramble the egg, then mix). If you have leftover rice, use it instead of noodles for a quick fried rice.
- The Efficiency: It takes 15 minutes. Perfect for a quick dinner. Prep all the veg in advance and store in the fridge for even faster midweek meals.
- The Waste Reduction: Use the vegetable scraps to make a stock. Use leftover rice for a salad. Any leftover stir-fry can be packed for lunch the next day – it’s good cold too.
Typical Mistakes to Avoid
- Overcooking the vegetables: Cook them until they are crisp-tender.
- Not seasoning the noodles: Noodles need salt and sauce.
- Using cold oil: The oil must be hot before adding the vegetables – they should sizzle when they hit the pan.
Quick Checklist for Success
- ☐ Vegetables are crisp-tender.
- ☐ Noodles are cooked but not mushy.
- ☐ Sauce is well-seasoned.
- ☐ Herbs are fresh.
- ☐ Oil is hot.
8. The Classic Lentil and Tomato Soup
Soup is the ultimate comfort food, especially in the UK. A lentil and tomato soup is cheap, healthy, and filling. It’s a great way to use up vegetables and make a meal for the whole week. A big pot of this on a Sunday sets you up for easy lunches and quick dinners.
The Technique: Simmering and Thickening
The secret is to simmer the lentils and tomatoes until they are soft and the soup is thick. Red lentils are perfect because they break down completely, creating a creamy texture without any cream.
How to Start (Beginner Stage)
- The Setup: Fry chopped onions and carrots in a little oil. Add red lentils, a tin of chopped tomatoes, and vegetable stock. Simmer for 30 minutes until the lentils are soft.
- The Risk: The lentils are hard. The soup is thin.
- The Fix: Cook the lentils longer – they should be completely soft and starting to fall apart. If the soup is too thin, let it simmer uncovered for a bit. If too thick, add a splash of water.
How to Evolve (Competent Stage)
- The Upgrade: Add garlic, cumin, and coriander. Use a splash of coconut milk for richness. A pinch of smoked paprika gives a lovely depth.
- The Nuance: The texture. Mash some of the lentils against the side of the pot with a wooden spoon to make the soup thicker and creamier. Or use a stick blender for a few seconds, leaving some chunky bits.
- The Flavour: Finish with fresh herbs (parsley or coriander) and a squeeze of lemon. A swirl of yogurt or a drizzle of olive oil on top looks beautiful.
How to Master (Adaptive Stage)
- The Adaptation: Use any veg you have – celery, leeks, peppers, or a handful of spinach stirred in at the end. Add leftover roasted vegetables. If you have a bag of frozen peas, throw them in for the last 5 minutes.
- The Efficiency: It takes 40 minutes. Perfect for a quick dinner. Make a double batch and freeze in portions – it’s brilliant to have on standby.
- The Waste Reduction: Use the vegetable scraps to make a stock. Use leftover bread to make croutons. The soup itself is a great way to use up veg that’s past its best.
Typical Mistakes to Avoid
- Not cooking the lentils: Lentils need to be soft.
- Adding salt too early: Salt can toughen the lentils. Add it at the end.
- Overcooking the soup: Don’t let it boil too hard – a gentle simmer is best.
Quick Checklist for Success
- ☐ Lentils are soft.
- ☐ Soup is thick.
- ☐ Herbs are fresh.
- ☐ Lemon juice is added.
- ☐ Salt is adjusted.
9. The Simple Roasted Veggie and Halloumi Plate
Halloumi is a popular cheese in the UK that doesn’t melt – it goes gloriously golden and squeaky when fried. This dish is a great way to use up vegetables and make a quick, healthy meal that feels a bit more exciting than a standard salad. It’s perfect for a meat-free Monday or a light weekend lunch.
The Technique: Roasting and Frying
The secret is to roast the vegetables until they are soft and caramelised, and fry the halloumi until it is golden and crisp on the outside. The contrast of textures – tender veg and squeaky cheese – is what makes it so satisfying.
How to Start (Beginner Stage)
- The Setup: Roast vegetables (sweet potatoes, carrots, broccoli) tossed in oil and salt at 200°C (180°C fan, gas mark 6) for 30 minutes. Slice halloumi and fry in a dry non-stick pan for 2 minutes each side until golden. Serve together.
- The Risk: The vegetables are raw. The halloumi is burnt.
- The Fix: Roast the vegetables until a knife slides in easily – 30 minutes is usually right, but larger chunks may need longer. Fry the halloumi over medium heat; it burns quickly, so keep an eye on it.
How to Evolve (Competent Stage)
- The Upgrade: Add herbs (thyme, rosemary) and garlic to the roasting veg. Use a mix of olive oil and lemon juice. A drizzle of honey over the halloumi just before it finishes gives a sweet-salty glaze.
- The Nuance: The texture of the halloumi. Fry it until it is golden and crispy on the outside but still soft inside. Don’t move it around too much – let it develop a crust.
- The Flavour: Finish with fresh herbs and a squeeze of lemon. A sprinkle of chilli flakes adds a nice kick.
How to Master (Adaptive Stage)
- The Adaptation: Use any veg you have – courgettes, peppers, red onion, or even leftover roasted veg from yesterday. If you have a bag of frozen peas, add them to the roasting tin for the last 5 minutes. Swap halloumi for feta or goat’s cheese if that’s what’s in the fridge.
- The Efficiency: It takes 35 minutes. Perfect for a quick dinner. Roast a big tray of veg and keep the leftovers for lunches – they’re delicious cold.
- The Waste Reduction: Use the vegetable scraps to make a stock. Use leftover bread to make croutons. Any leftover halloumi can be chopped into a salad the next day.
Typical Mistakes to Avoid
- Not roasting the vegetables: Vegetables need to be soft and caramelised.
- Overcooking the halloumi: Halloumi burns easily. Medium heat and a close watch are essential.
- Not seasoning the vegetables: Vegetables need salt and oil.
Quick Checklist for Success
- ☐ Vegetables are soft.
- ☐ Halloumi is golden.
- ☐ Herbs are fresh.
- ☐ Lemon juice is added.
- ☐ Salt is adjusted.
10. The Classic Egg and Chips (with a Twist)
This is the ultimate British comfort food. But we’re going to add a twist to make it a bit more nutritious and interesting. We’ll use baked chips instead of fried, and add a side of greens – because even comfort food can have a little virtue. It’s the meal you make when you want something deeply satisfying with minimal effort.
The Technique: Baking and Frying
The secret is to bake the chips until they’re properly crispy, and to fry the eggs until the whites are set but the yolks are still gloriously runny. Getting both elements right at the same time takes a little practice, but it’s worth it.
How to Start (Beginner Stage)
- The Setup: Cut potatoes into chunky chips, toss with oil and salt, and spread on a baking tray. Bake at 200°C (180°C fan, gas mark 6) for 40 minutes, turning halfway. Fry eggs in a little butter or oil. Serve with a handful of greens (spinach, peas, or steamed broccoli).
- The Risk: The chips are raw. The eggs are burnt.
- The Fix: Bake the chips until they are golden and crisp – don’t rush them. Fry the eggs over medium-low heat so the whites cook gently without burning.
How to Evolve (Competent Stage)
- The Upgrade: Add herbs (parsley, chives) and garlic powder to the chips. Use a mix of olive oil and a little melted butter. A sprinkle of paprika or smoked salt takes them up a notch.
- The Nuance: The texture of the chips. Soak the cut potatoes in cold water for 30 minutes before baking to remove excess starch – this helps them crisp up. Dry them thoroughly before oiling.
- The Flavour: Finish with fresh herbs and a squeeze of lemon. A dollop of brown sauce or ketchup on the side is non-negotiable for many.
How to Master (Adaptive Stage)
- The Adaptation: Use any veg you have – sweet potato chips are brilliant. Add leftover roasted vegetables on the side. If you have a bag of frozen peas, serve them buttery and minted. Swap the fried egg for poached if you’re feeling fancy.
- The Efficiency: It takes 45 minutes, but most of that is oven time. Perfect for a quick dinner when you can potter about while the chips bake.
- The Waste Reduction: Use the potato peelings to make a snack. Use leftover bread to make croutons for a side salad. Any leftover chips can be reheated in the oven for lunch.
Typical Mistakes to Avoid
- Not baking the chips long enough: Chips need to be crispy.
- Overcooking the eggs: Eggs burn easily. Low and slow is best.
- Not seasoning the chips: Chips need salt and oil.
Quick Checklist for Success
- ☐ Chips are crispy.
- ☐ Eggs are perfect – whites set, yolks runny.
- ☐ Herbs are fresh.
- ☐ Lemon juice is added.
- ☐ Salt is adjusted.
Putting It All Together: A Weekly Plan
Now that you know the ten classic dinner ideas, how do you use them? The key is to plan your week around these dishes, using leftovers and batch cooking to save time and money. Here’s a flexible template that works with the rhythms of a typical British week.
Monday: The One-Pot Roast Chicken
- Why: Start the week with a classic. It’s a good way to use up the chicken from the freezer, and the leftovers will set you up for tomorrow.
- Tip: Cook two chickens if you have a large family or want extra meat for lunches. Save the second one for sandwiches or a pie later in the week.
Tuesday: The Simple Pasta with Garlic, Oil, and Lemon
- Why: It’s fast and light. Perfect for a busy Tuesday when you’re still recovering from Monday.
- Tip: Shred any leftover chicken from Monday and toss it through the pasta for a more substantial meal.
Wednesday: The Classic Beef and Vegetable Stew
- Why: It’s a hearty meal for a cold night. If you made a big batch on Sunday, tonight you just need to reheat it gently while you steam some greens.
- Tip: Cook a big batch on Sunday and eat it for three days. It keeps well in the fridge and the flavour improves.
Thursday: The Quick Chicken and Vegetable Curry
- Why: It’s a quick and healthy meal that uses up any lingering veg.
- Tip: If you have leftover stew from Wednesday, stir in a spoonful of curry paste, a splash of coconut milk, and some spinach to transform it into a completely different dish. Or use the last of the roast chicken.
Friday: The Classic Baked Fish with Potatoes and Lemon
- Why: It’s a light meal for the end of the week, and it feels a bit special without much effort.
- Tip: Use frozen fish fillets – just thaw them in the fridge during the day. Add a handful of cherry tomatoes to the tray for extra colour.
Saturday: The Simple Vegetable Stir-Fry with Noodles
- Why: It’s a fun and healthy meal for a weekend. A great way to use up any veg that’s looking a bit tired.
- Tip: If you have leftover fish from Friday, flake it into the stir-fry at the end. Or add a beaten egg for extra protein.
Sunday: The Classic Lentil and Tomato Soup
- Why: It’s a comforting meal for the start of the next week. Make a big pot and you’ll have lunches sorted.
- Tip: Use any leftover veg from the week – carrot ends, celery sticks, a lone leek – to bulk it out. Serve with crusty bread.
Bonus: The Roasted Veggie and Halloumi Plate
- Why: It’s a great way to use up leftover vegetables and makes a brilliant meat-free meal.
- Tip: If you have leftover soup from Sunday, serve a small bowl alongside the halloumi and veg for a more substantial dinner.
Bonus: The Egg and Chips (with a Twist)
- Why: It’s a fun and comforting meal for the end of the week when you can’t face anything complicated.
- Tip: Use any leftover halloumi from the previous day – fry it up with the chips for a salty, squeaky addition.
FAQ: Common Questions About Classic Dinners
Q: Can I make these dishes without a recipe?
A: Absolutely. Once you’ve made the stew a few times, you’ll know the drill: brown the meat, soften the onions, add stock, simmer. It’s like riding a bike. The key is to understand the basics of cooking, such as browning, simmering, and seasoning. After a while, you’ll be able to do it by eye and by taste.
Q: What if I don’t have all the ingredients?
A: That’s the beauty of these classics – they’re templates, not strict rules. No lentils? Use a tin of chickpeas. No halloumi? A handful of grated cheddar melted over the veg works a treat. The skill is in adapting to what you have. A well-stocked store cupboard (tins of tomatoes, coconut milk, a few spices) makes improvisation much easier.
Q: How do I know if the meat is cooked?
A: A meat thermometer is your best mate. For chicken, the internal temperature should reach 75°C (165°F); for beef, 63°C (145°F) for medium. No thermometer? Pierce the thickest part – juices should run clear for chicken, and for beef it should feel springy when pressed. With practice, you’ll develop a feel for it.
Q: Can I freeze these dishes?
A: Yes, most of these dishes freeze brilliantly. The stew, curry, and soup are particularly good for freezing. Shepherd’s pie can be frozen whole or in portions. Portion them up in old takeaway containers (washed, of course), label with the date, and they’ll keep for up to 3 months. Defrost overnight in the fridge and reheat thoroughly.
Q: What is the best way to save time?
A: Batch cooking is the secret. Spend an hour on Sunday prepping veg, making a big stew, and roasting a chicken. Then you’ve got the bones for stock and meals for days. Also, keep a bag of frozen mixed veg and some ready-to-cook noodles in the freezer – they’re a lifeline on busy nights.
Q: How do I make the food taste better?
A: Salt, acid, and herbs. A squeeze of lemon or a splash of vinegar can lift a dull dish. And don’t be shy with fresh parsley or coriander – they’re cheap at the market and add brightness. Taste as you go, and adjust the seasoning before serving.
Q: What is the most important thing to remember?
A: Don’t rush. Let the onions soften properly, let the meat brown, let the stew simmer. Good food takes a little time, but it’s worth it. And remember, every cook has failures – it’s how you learn.
Final Thoughts: The Joy of Cooking
Mastering these ten classic dinner ideas isn’t just about making food. It’s about reclaiming the joy of cooking. It’s about turning the panic of 5 pm into the confidence of a home cook who knows exactly what to do. When you know these dishes, you stop staring at the fridge and start seeing possibilities. You stop buying takeaways and start making meals that are healthier, cheaper, and more delicious. You stop worrying about waste and start using up what you have.
Cooking is a skill that grows with practice. The more you cook, the more confident you become. The more you cook, the more you enjoy it. And the more you enjoy it, the more you will want to cook. These ten dishes are like old friends – they’ll be there for you on rainy Tuesdays, on busy Thursdays, and on lazy Sundays. They’ll help you feed your family without stress, and they’ll remind you that a home-cooked meal is one of the simplest, most satisfying pleasures there is.
So, start with one of these ten dishes. Try it out. Make it your own. And then, try the next one. Soon, you’ll have a toolkit of ten classic dinners that will save you for the rest of your life. Remember, you don’t need to be a professional chef to cook a great meal. You just need to know the basics, be patient, and have a little fun. And that is what British home cooking is all about.
Eleanor Hart
Everyday Cooking Chronicle
London, UK