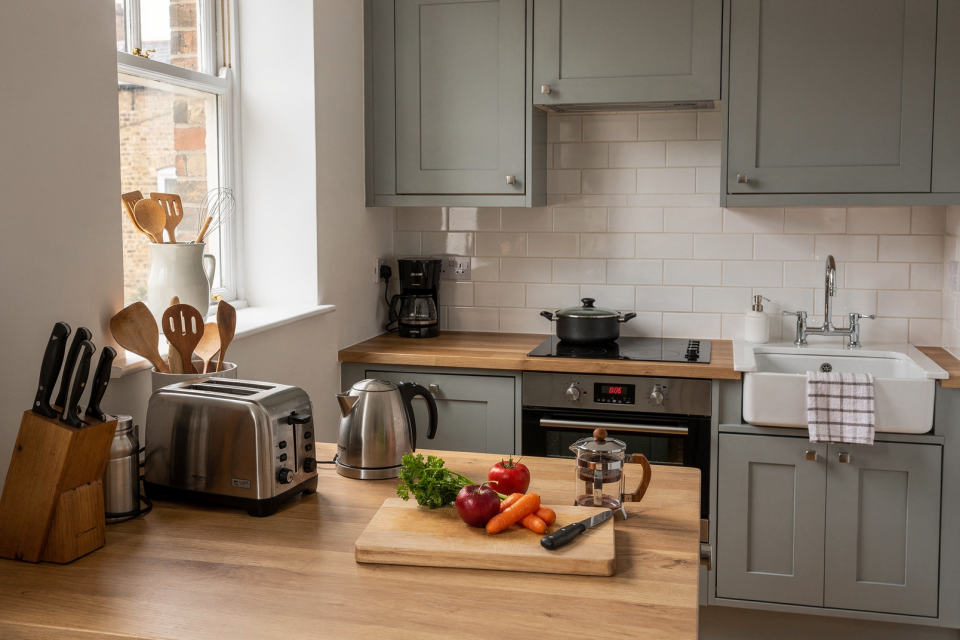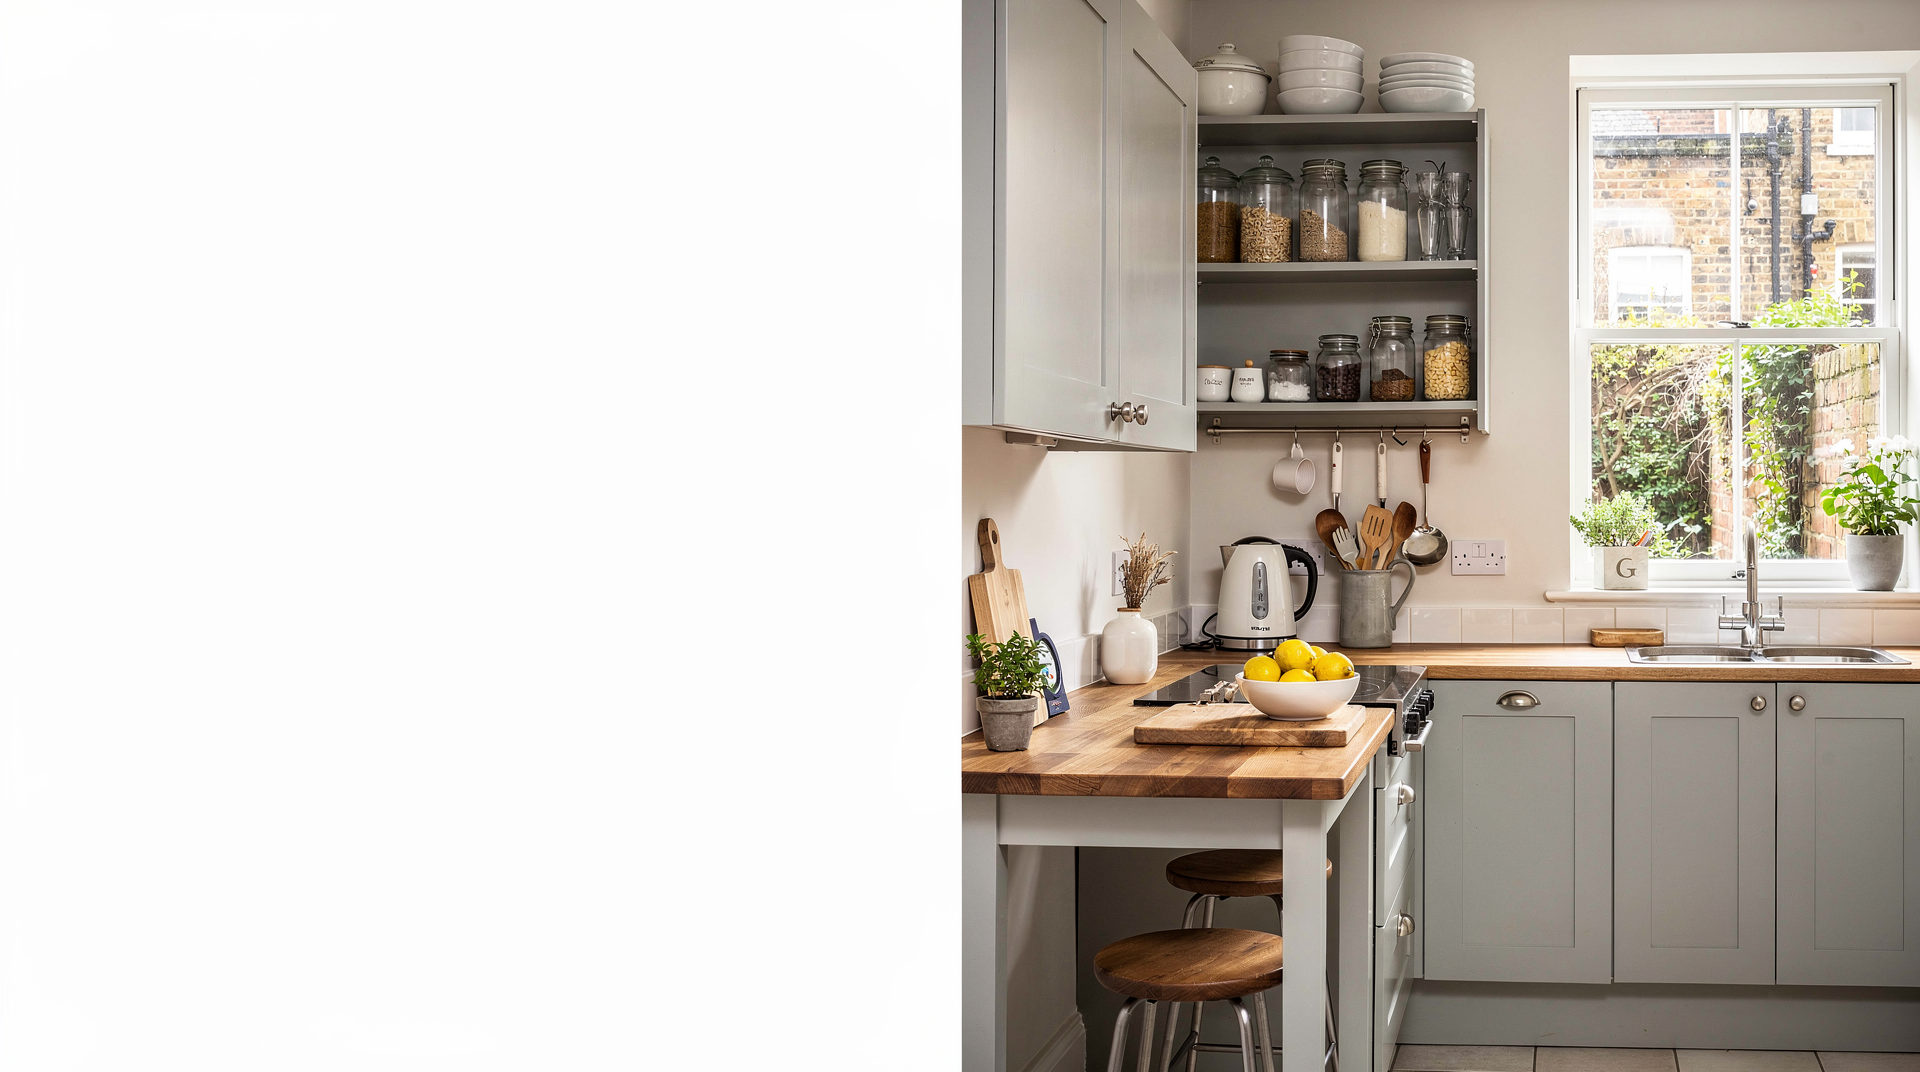
If you’ve ever stood in your kitchen at 5 p.m. on a rainy Tuesday, staring into a fridge that feels more like a black hole than a food source, you know the frustration. Here in the UK, where housing stock is often older and square footage is a luxury, many of us are cooking in kitchens that somehow feel smaller than the recipes we try to follow. The result? A chaotic dance of opening cupboards, knocking over jars of Bisto, and hunting for the butter knife that’s always in the wrong drawer.
Organising a small kitchen isn’t just about tidying up; it’s about survival. It’s about turning a cramped, stressful space into a functional, efficient, and genuinely enjoyable part of your daily life. This guide walks you through the process step-by-step — from the mindset shift right through to the final shelf placement. We’ll cover how to assess your current situation, declutter without guilt, and build a system that works for your specific lifestyle. Whether you’re in a compact London flat, a Victorian terrace with a narrow galley kitchen, or a modern apartment with a kitchenette that’s more cupboard than room, these principles apply.
Let’s stop losing your mind and start cooking with confidence — even when the Sainsbury’s delivery has left you with nowhere to stand.
Phase 1: The Mindset Shift and Initial Assessment
Before you buy a single storage bin or reposition a single saucepan, you need to change the way you think about your kitchen. Many of us approach small kitchen organisation with the goal of “making it look like a magazine.” That’s a trap. Magazines are for coffee tables; your kitchen is for cooking. The goal isn’t perfection — it’s unapologetic functionality. You want to be able to knock together a quick leek and potato soup or a midweek pasta bake without a trail of destruction.
Why Your Current Approach Might Be Failing
In the early stages of kitchen organisation, the most common mistake is trying to organise everything at once. You open every cupboard, pull out everything, and then try to fit it back in. This leads to:
- Decision fatigue: You’re overwhelmed by the sheer volume of items, from mismatched Tupperware lids to that jar of harissa you bought from the reduced aisle at Sainsbury’s and used once.
- Re-cluttering: You put things back in the same chaotic spots because you don’t have a clear system yet.
- Wasted effort: You spend hours rearranging things that don’t need to be moved, while the real pain points remain untouched.
The first step is to stop. Take a breath. Ask yourself: What is my kitchen actually for? For most British home cooks, it’s for making quick, nutritious meals on a budget, reducing food waste, and feeding the people we live with without wanting to scream. If your current setup doesn’t support that, it needs a rethink.
The “As-Is” Audit: Where Are You Now?
You need to know your starting point — not to judge yourself, but to gather honest data. Spend 15 minutes doing a quick audit of your kitchen. A cuppa in hand optional, but recommended.
1. Map the Flow
Walk through your kitchen as if you were cooking a simple meal — say, bangers and mash with onion gravy. Notice where you stop, where you reach, and where you get stuck.
- The “Traffic Jam” Zones: Are there areas where you constantly bump into the table, the door, or the dog?
- The “Reach” Zones: Do you have to stretch over the kettle to reach the flour, or climb onto a chair for the baking tray?
- The “Dead” Zones: Are there corners or high shelves that never get used because they’re awkward?
2. The Item Count
Take a rough inventory of your most-used items. Don’t count everything — just the essentials.
- How many pots and pans do you actually reach for in a week?
- How many tins of beans, chopped tomatoes, and soup are crammed into the cupboards?
- How many utensils are jamming the drawer so you can’t find the spatula?
3. The Pain Points
Write down three things that make you lose your mind in your kitchen right now. Be specific.
- Example: “I can’t find the butter knife because the drawer’s a mess.”
- Example: “The toaster blocks the sink and I can’t drain the pasta.”
- Example: “I have too many tins and no room for fresh veg from Lidl.”
This audit gives you a baseline. It tells you exactly where the problems are and helps you prioritise your next steps, rather than trying to fix everything at once.
The Risk of “Organisation Without Strategy”
Without a clear strategy, organisation efforts often backfire. You might end up with:
- Over-organisation: Buying too many matching bins and containers that take up more space than the items they hold.
- Misplacement: Putting things in “logical” spots that don’t match your actual cooking habits — like keeping everyday spices on the top shelf because they look tidy.
- Temporary fixes: Solving one problem today but creating a new one tomorrow (moving the toaster only to block the cutlery drawer).
The key is to think in phases. Start with the mindset, move to the assessment, and then, and only then, tackle the physical organisation. This phased approach reduces the risk of overwhelm and ensures you’re building a system that will actually last through the chaos of a weeknight spag bol.
Phase 2: The Triage – Decluttering and Categorising
Once you’ve assessed your kitchen honestly, the next step is to declutter. This is the most critical phase. You cannot organise a kitchen that’s bursting with things you never use. Here in the UK, where we’re often prone to keeping things “just in case” (what if the whole family comes for a roast and we need three extra gravy boats?), this step is absolutely vital.
The “Keep, Toss, Donate” Rule
Take everything out of your cupboards, drawers, and even the bits in the fridge that are just taking up space. Don’t be gentle — pull it all out onto the worktop. Then sort every single item into one of three categories:
- Keep: Items you use regularly, that are in good condition, and that genuinely fit your cooking style.
- Toss: Broken gadgets, expired food, duplicates you don’t need, and anything you haven’t used in over a year and can’t imagine using again.
- Donate: Items that are still perfectly fine but don’t earn their keep: that extra set of Tupperware you never open, the novelty biscuit cutters, the bread maker gathering dust.
Pro Tip: If you’re on the fence about an item, ask yourself: Would I buy this again today? If the answer is no, it’s probably not worth the space it’s hogging.
Common Items to Toss in a Small UK Kitchen
Certain items are more likely to be clutter than help in a compact kitchen. Here’s a table of usual suspects:
| Item Category | Why It’s a Problem | Action |
|---|---|---|
| Expired Food | Tins, jars, and packets past their date can be unsafe and take up precious cupboard space. | Toss immediately — check your local council’s food waste recycling rules. |
| Duplicate Utensils | Do you really need four vegetable peelers and three butter knives? | Keep one or two, donate the rest to a charity shop. |
| Broken Gadgets | A blender with a cracked base or a kettle with a dodgy cord is a safety hazard and a space waste. | Toss or repair if it’s a cheap fix. |
| Unused “Special” Items | The pasta maker you bought for a holiday, the spiralizer that seemed fun, the egg poacher you tried once. | Donate or sell online. |
| Old Spices | Spices lose their oomph after 2–3 years, and a jar of dusty paprika won’t do your chorizo any favours. | Toss if old and replace with smaller amounts from the refill shop or the world foods aisle. |
| Extra Tupperware | Too many mismatched lids that never fit; containers that breed in the dark corners of cupboards. | Keep a matching set you’ll actually use, recycle the rest. |
Categorising for Efficiency
Once you’ve decluttered, it’s time to categorise what you’re keeping. This isn’t just about grouping similar items — it’s about grouping them by how you use them.
1. The Cooking Zone
This is where the heat happens. Group items here:
- Pots, pans, baking trays, and roasting tins
- Cutting boards and knives (you only need a chef’s knife, a paring knife, and a bread knife)
- Measuring cups, spoons, and the kitchen scale
- Mixing bowls that nest inside each other
2. The Storage Zone
Where you stash your ingredients. Group here:
- Tins, jars, and packets — think baked beans, chopped tomatoes, pasta, rice
- Fresh produce that doesn’t need the fridge (potatoes, onions, garlic)
- Dry goods in airtight containers to keep the moths at bay
3. The Cleaning Zone
Under the sink or near the draining board, keep:
- Dishcloths, sponges, and a scrubbing brush
- Washing-up liquid, surface spray, and a decent degreaser
- Bin bags and recycling totes
4. The Serving Zone
Where you dollop and deliver. Group here:
- Plates, bowls, and cups (stack them to save space)
- Serving utensils, cutlery, and napkins
- Any special platters you actually use (be honest)
By categorising by function, you create a natural flow. When you’re mid-cook, you’ll grab from the Cooking Zone without a second thought, and when you’re storing leftovers, the Storage Zone makes it swift and simple.
The Risk of “Decluttering Without Purpose”
If you declutter without a sense of purpose, you might run into:
- Under-storage: You toss too much and then find you’ve nowhere to put the things you actually need.
- Re-hoarding: The guilt kicks in and you start buying new gadgets to fill the emotional void.
- Mis-categorisation: You put things in the wrong zone (like keeping the salt and pepper in a different postcode from the hob), making your kitchen less efficient than ever.
So declutter with a plan. Know what you’re keeping, where it’s going, and why it earns its keep on your worktop.
Phase 3: The Layout – Designing for Your Space
Now that you’ve decluttered and categorised, it’s time to design the layout. This is where the magic happens. A thoughtful layout turns a tiny, chaotic space into a kitchen that practically works around you.
The Golden Rule of Small Kitchen Layouts: Work Within Your Reach
In a small kitchen, every inch is precious. The golden rule: keep everything within your natural reach. If you have to stretch over the washing machine, climb onto a stool, or shift three things to get to one, it’s in the wrong home.
1. The “Triangle” of Efficiency
The most efficient kitchen layout is based on a triangle between three key points:
- The Sink: Where you wash, drain, and prep veg.
- The Stove: Where the actual cooking happens.
- The Fridge: Where fresh ingredients live.
These three should be close together — ideally no more than a couple of steps between each. In a small kitchen, the triangle is often naturally compact, but if yours isn’t (say, the fridge is in another room or under a counter), work consciously to minimise the distance. Even a tiny tweak, like moving the utensil pot closer to the hob, can save you dozens of steps a day.
2. The “Reach” Zones
Think about your reach in three levels:
- Primary Reach (waist to eye level): Items you use every day — the butter knife, tea bags, salt, cooking oil. Keep these right where your hand naturally goes.
- Secondary Reach (just above eye level or just below waist): Items you use frequently but not daily — baking tray, colander, spice jars. They’re still accessible but not in the prime spot.
- Tertiary Reach (high shelves or deep corners): Items you use rarely — the Christmas pudding basin, extra Tupperware, the bread machine. Tuck these away in the less convenient spots.
Organising by reach means you’ll never have to perform kitchen acrobatics again.
Adapting to Your Kitchen Type
Not all small kitchens are the same. Adapt your layout to your specific space.
1. The Compact London Flat
Challenge: Very little floor space, often a single wall of units with a fridge crammed in.
Solution: Use vertical space aggressively. Install a sturdy shelf above the worktop for spices and oils, mount a magnetic knife strip on the wall, and use hanging racks for your most-used pots and pans. Keep the worktop as clear as possible — it’s your primary workspace.
Tip: If your fridge and hob are on the same run, even better: you can pivot between them while keeping an eye on the onion.
2. The Victorian Terrace Scullery
Challenge: Narrow, long space with units on one or both sides and perhaps a window at the end.
Solution: Think in zones along the length. Place the sink at one end, the hob further down, and use the middle stretch as a mini worktop bridge. A slim, freestanding butcher’s block can act as a prep island if you have the width.
Tip: Keep the walkway clear — never store things on the floor or in the thoroughfare, or you’ll be side-stepping all through dinner prep.
3. The Modern Apartment Kitchenette
Challenge: Sleek but minimal cabinetry, often integrated appliances.
Solution: Exploit every bit of under-counter storage. Pull-out drawers with dividers are your best friends. The space under the sink can hold a pull-out caddy for cleaning supplies.
Tip: Keep the fridge and hob as close as possible to create a compact cooking zone, and use a fold-down wall-mounted table if you need extra surface space.
The Risk of “Layout Without Flexibility”
Designing a rigid layout often backfires. Signs you’ve gone too far:
- Rigid spaces: You’ve bolted everything in place and can’t adjust when your cooking needs change — say, when you start batch-cooking soups and need room for a stockpot.
- Inefficient zones: You’ve placed items based on guesswork, not real-life habits, so you’re still walking in circles.
- Overcrowding: You’ve filled every millimetre, leaving no breathing room to actually work.
The solution: design with flexibility in mind. Use stackable bins, adjustable shelving, and keep one shelf or drawer slightly empty for the future. A kitchen that can adapt is a kitchen that stays organised.
Phase 4: The Storage – Maximising Every Inch
With a layout blueprint in hand, you’re ready to fill it with smart storage. In a small kitchen, storage isn’t just about hiding stuff — it’s about creating space you didn’t know you had.
The “Vertical” Strategy
The single most effective move in a small kitchen is to go vertical. Stop thinking only about cupboards; use your walls.
1. Wall Shelves
Install sturdy shelves above the worktop or wherever you have a bare wall. Use them for:
- Jars of dried herbs, spices, and pulses (the uniform look of glass jars soothes the soul and helps you see what you’re running low on)
- A neat row of your most-used pots and pans
- Utensil crocks and a little pot of basil from the supermarket
2. Hanging Racks
A ceiling-mounted pot rack or a wall-mounted rail with S-hooks frees up drawer and cupboard space. Hang:
- Saucepans and frying pans
- Stainless steel utensils (ladle, slotted spoon, spatula)
- Even a colander if it’s pretty enough
3. Over-the-Door Storage
The inside of a cupboard door or the back of the kitchen door itself is often wasted. Use over-door organisers for:
- Cleaning supplies (spray bottles, cloths, sponges)
- Clips for rubber gloves and dustpan and brush
- Spice racks or small containers of bits and bobs
By using vertical space, you reclaim the worktop and cupboards for things that truly need an enclosed home.
The “Under-Counter” Strategy
The area below the worktop is often a dumping ground. Transform it with:
- Pull-out drawers for pans and baking trays — no more crouching and rummaging.
- Slide-out caddies for cleaning supplies under the sink.
- Stackable bins for potatoes, onions, and other root veg that prefer the dark.
Pro Tip: Use drawer dividers — they stop potato mashers from tangling with wooden spoons and make it a doddle to find what you need, even when you’re in a hurry.
The “Cabinet” Strategy
Cupboards are still the backbone of kitchen storage. Optimise them:
- Group by category: Keep all baking supplies together, all tinned goods together, all condiments together. It saves the mental energy of scanning three cupboards for the Marmite.
- Use the back of the door: Stick on small wire racks or adhesive hooks for utensils, measuring spoons, or a tea towel.
- Top shelf real estate: Store rarely-used items here (like that slow cooker you only use in winter) and keep a small folding step stool handy so you can reach them safely.
Organised cupboards don’t just look tidy; they make your whole cooking rhythm feel smoother.
The Risk of “Storage Without Organisation”
If you simply stuff storage into every gap, you’ll quickly run into:
- Cluttered cupboards: Bins and boxes that don’t fit create their own chaos.
- Misplaced items: The baking powder ends up behind the tinned tomatoes, never to be seen again.
- Over-storage: Buying too many organising gizmos that take up more room than the things they hold.
The fix: always match the storage solution to the item, and regularly edit what you’ve got. Less is genuinely more in a small kitchen.
Phase 5: The System – Building a Routine That Works
A beautifully organised kitchen is only half the battle. To keep it that way through the daily whirlwind of lunchboxes, last-minute stir-fries, and a Tesco delivery that needs unpacking, you need a system — simple routines that stop the clutter creeping back.
The “Daily Reset” Routine
The most important habit is the daily reset. It doesn’t need to be grand; it just needs to be consistent.
1. The 5-Minute Reset
At the end of the day (or after dinner, while the kettle’s boiling for a cuppa), spend five minutes:
- Put away any ingredients, utensils, or gadgets you used.
- Wipe down the worktop and hob — a quick squirt of spray and a cloth go a long way.
- Stack the dishwasher or wash up the day’s bits; don’t leave a “just-a-few” pile.
- Quick-check the fridge for anything that needs using up or has gone past its best.
This tiny reset prevents the mess from snowballing into a weekend marathon.
2. The Weekly Deep Clean
Once a week — I like to do it on a Sunday while listening to the radio — do a slightly deeper dive:
- Wipe down cupboard fronts and drawer edges.
- Check the fridge thoroughly: give crisper drawers a rinse, condense half-empty jars, and note what’s coming up for next week’s meal plan.
- Clean the sink, hob, and any areas that have collected splatters.
- Toss or compost any sad-looking herbs or veg that didn’t get used.
A weekly clean keeps the kitchen fresh and gives you a moment to reflect on what’s working.
The “Monthly Review” Routine
Set a calendar reminder for a quick monthly review, maybe the first Saturday of the month:
- Are your storage solutions still working, or have you merely created new piles inside bins?
- Is there anything you haven’t used in the last four weeks that could be donated or moved to tertiary storage?
- Do you need to adjust zones? (Maybe the baking stuff needs to move now that you’re into a batch-cooking phase.)
This regular check-in stops small inefficiencies from becoming ingrained bad habits.
The Risk of “System Without Consistency”
Without consistency, even the best system crumbles:
- Re-cluttering: You skip the daily reset for a few days, and suddenly the worktop is buried again.
- Inefficiency: You forget why you put the colander in that cupboard, and you’re back to the hunt.
- Frustration: The system feels like a chore, so you abandon it entirely.
Consistency doesn’t mean perfection — it just means showing up for those five minutes most days. And if you miss a day? Just do it the next. No guilt, just a reset.
Phase 6: The Maintenance – Keeping It Organised for Life
The final phase is maintenance: the art of keeping your kitchen organised for the long haul without feeling like you’re living in a show home.
The “Adaptability” Principle
Your kitchen needs to adapt as your life changes. When you start working from home more, your lunch habits might change. When you start batch-cooking for the freezer, your storage demands shift. Embrace that evolution.
1. The “Review” Principle
Monthly (as above), ask yourself honestly: Is this layout still serving me? If you’re now doing big weekly shops at Lidl, maybe you need a dedicated “bulk” shelf. If you’ve taken up making your own stock, you might need a spot for a big saucepan and a sieve you can reach easily.
2. The “Evolve” Principle
As your cooking style evolves, evolve the kitchen. Add a narrow shelf for cookery books if they were previously balanced on the microwave. Swap out that utensil pot for a wall-mounted rail if you need more worktop space. Don’t be afraid to let go of a “good” idea that no longer works.
The “Sustainability” Principle
Making your kitchen work well long-term also means thinking about the planet and your wallet.
1. The “Eco” Principle
Choose storage solutions that are built to last and gentle on the environment:
- Glass jars instead of plastic containers (they don’t hold smells and can go from pantry to fridge to dishwasher).
- Reusable beeswax wraps or silicone lids instead of cling film.
- A compost caddy on the worktop for veg peelings, coffee grounds, and tea bags — check your council’s food waste collection.
2. The “Waste” Principle
Reduce food waste by organising your storage to see what you have. When you know exactly what’s in the cupboard and fridge, you’re far more likely to use it up. A quick weekly “fridge foray” — turning wilting veg into a soup or a stir-fry — becomes second nature.
The Risk of “Maintenance Without Adaptation”
If you rigidly maintain without adapting, the kitchen will eventually stop working for you:
- Stagnation: You’re still using the layout from three years ago when you didn’t have a family or a different job.
- Inefficiency: New items creep in and don’t find a proper home, creating new clutter pockets.
- Frustration: You feel like you’re constantly fighting the space instead of it helping you.
The key is to keep reviewing, evolving, and choosing sustainable options — that’s how your small kitchen stays your best ally through every drizzly Tuesday and beyond.
Practical Tools: Checklists, Tables, and FAQs
To help you put this into action right away, here are some printable-keep-handy tools.
The Small Kitchen Organisation Checklist
| Step | Action | Done? |
|---|---|---|
| 1. Mindset | Change how you think about your kitchen — aim for function, not perfection. | ☐ |
| 2. Audit | Do an honest “as-is” walkthrough and note pain points. | ☐ |
| 3. Triage | Declutter using Keep/Toss/Donate and categorise by zone. | ☐ |
| 4. Layout | Design a reach-friendly layout based on your kitchen type. | ☐ |
| 5. Storage | Maximise vertical, under-counter, and cabinet space. | ☐ |
| 6. System | Build a daily and weekly routine you can stick to. | ☐ |
| 7. Maintenance | Adapt and review monthly so it stays fresh. | ☐ |
The Small Kitchen Storage Table
| Zone | Items to Store | Storage Solution |
|---|---|---|
| Cooking | Pots, pans, knives, cutting boards | Wall shelves, magnetic strips, hanging racks |
| Storage | Tins, jars, fresh produce, dry goods | Under-counter pull-outs, stackable baskets, airtight jars |
| Cleaning | Dishcloths, sponges, sprays, bin bags | Under-sink caddy, door hooks |
| Serving | Plates, bowls, cups, cutlery | Cupboards with stackers, drawer dividers |
FAQ: Common Questions About Small Kitchen Organisation
Q: How do I organise a kitchen with no cupboard space?
A: Go vertical. Install wall shelves, a pot rack, and over-the-door organisers. Keep the worktop as clear as possible and use under-sink and under-counter pull-out storage wherever you can.
Q: What’s the best way to store pots and pans in a small kitchen?
A: Hang them if possible — a ceiling rack or a wall rail near the hob works wonders. If not, nest them with protectors and store only what you regularly use, keeping the largest ones at the back of a low cupboard.
Q: How do I keep my kitchen organised when I’m busy?
A: Embrace the 5-minute daily reset. It’s short enough to do even when you’re shattered, and it stops the chaos building up. A weekly reset handles the deeper clean.
Q: What items should I toss in a small kitchen?
A: Expired food, broken gadgets, duplicate utensils you never use, and any “specialist” devices that haven’t seen the light of day in a year. If you haven’t used it since the last general election, it probably doesn’t deserve the space.
Q: How do I make my small kitchen feel bigger?
A: Use light, neutral colours where you can (even just repainting cupboard fronts). Keep the worktop clear, use uniform storage containers to reduce visual clutter, and add a mirror or good lighting. Space feels larger when you can actually see it.
Q: What’s the most important rule for small kitchen organisation?
A: Work within your reach. Keep daily-use items at waist or eye level, group by function, and don’t waste prime real estate on the Christmas pudding mould.
Q: How do I adapt my kitchen to my changing needs?
A: Do a monthly mini-review. Ask yourself what’s working and what’s making you grumble. Tweak zones, move things, and let go of storage “solutions” that have stopped solving anything.
Conclusion: From Chaos to Confidence
Organising a small kitchen isn’t a one-off weekend project — it’s a journey. It begins with a shift in mindset, flows through an honest declutter and a thoughtful layout, and settles into a gentle rhythm of daily resets and monthly tweaks. By following the phases in this guide, you can transform that cramped, frustrating space into a kitchen that actually helps you cook, even on the greyest, wettest Tuesday evening.
Remember, the goal isn’t a glossy magazine spread. It’s a kitchen where you can find the butter knife, whip up a decent omelette, and feel in control. Whether you’re in a compact London flat, a Victorian terrace with a narrow scullery, or a modern apartment with barely enough room for a kettle, these principles are yours to adapt.
So take a breath. Look at your kitchen — not with despair, but with possibility. Start small, build your system, and trust that your kitchen can become a friend rather than a foe. With a bit of clever organisation, you’ll cook with more confidence, waste far less, and maybe — just maybe — actually enjoy the daily ritual of feeding yourself and the people you share your home with.
Happy cooking, and here’s to a kitchen that works as hard as you do.